What feels now like ages ago, October maybe, I had my friend, C, over to visit on a weekend. She was getting married on New Years and when we stopped by Jo-Ann's she mentioned the possibility of sewing a wedding veil. Apparently the suckers sell for a couple hundred bucks.
Being the knowledgeable crafter that I can pretend to be I stated that sometimes fabric costs are just ridiculous, but suggested we look into it. So we found a pattern that was, thank-goodness, on sale. (Seriously why do they price patterns so high and then have the rotating sales available constantly, anyone who knows what they are about just waits for the brand they're looking for to be on sale.) And then we investigated the fabrics.
 |
| Embellishing the test veil. |
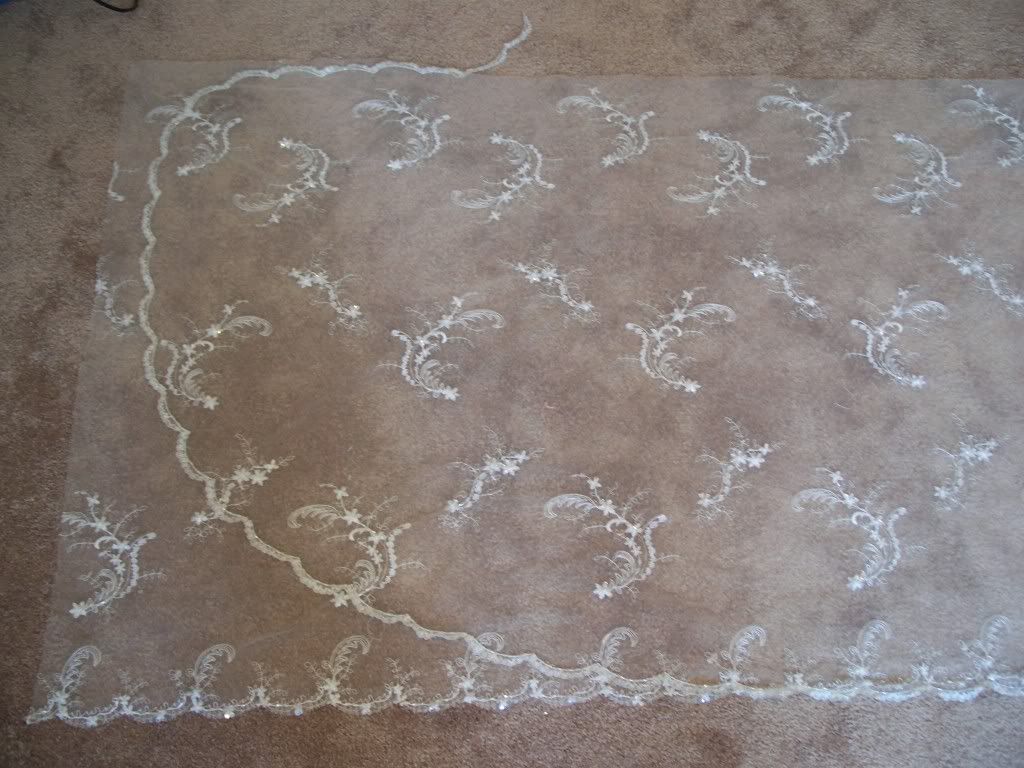
C found this beautiful tulle with detailed lace and beading on it. It too could be yours for only $25 (ish) a yard. And at 4 yards needed for the veil holy-moly that's a bit of a gamble for a project where success was not guaranteed. Then it occurred to me that we could just buy the cheap tulle at $3 (ish) a yard and practice! We proceeded to do just that.
At home I couldn't believe how easy it was. The most involved step was cutting out the giant swath of tulle with rounded edges (admittedly a good bit of time was saved in our test as we just left the edges raw). From there you baste a line across the top and then gather it all up into just a few inches. Secure the gather, attach some kind of fastener, and Huston we had a veil.
A bit later we went back to Jo-Ann's and C purchased the fancy fabric and left it in my care to be transformed.
Now of course things couldn't continue to be so easy. The 'good-fabric' had a nice lace/bead trim edging on each side of the fabric. Obviously this worked wonderfully for the hem on the bottom of the veil. The tricky bit is the fact that at its edges the fabric curves gently upward and only ends at the top of the veil.
 |
| Pinning the trimmed edging along the curve. |
So to make things nice first, using the pattern, cut of the top un-used portion of fabric. Then I set about very carefully cutting along the scalloped lace edge, following a particular strand of thread/beads. There was only a bit of length left as it stretched past the curves on the left and right hand corners so I also cut off the same strip from the unused 'top' portion of the original fabric panel.
 |
| A close up of how the cut piece was moved. |
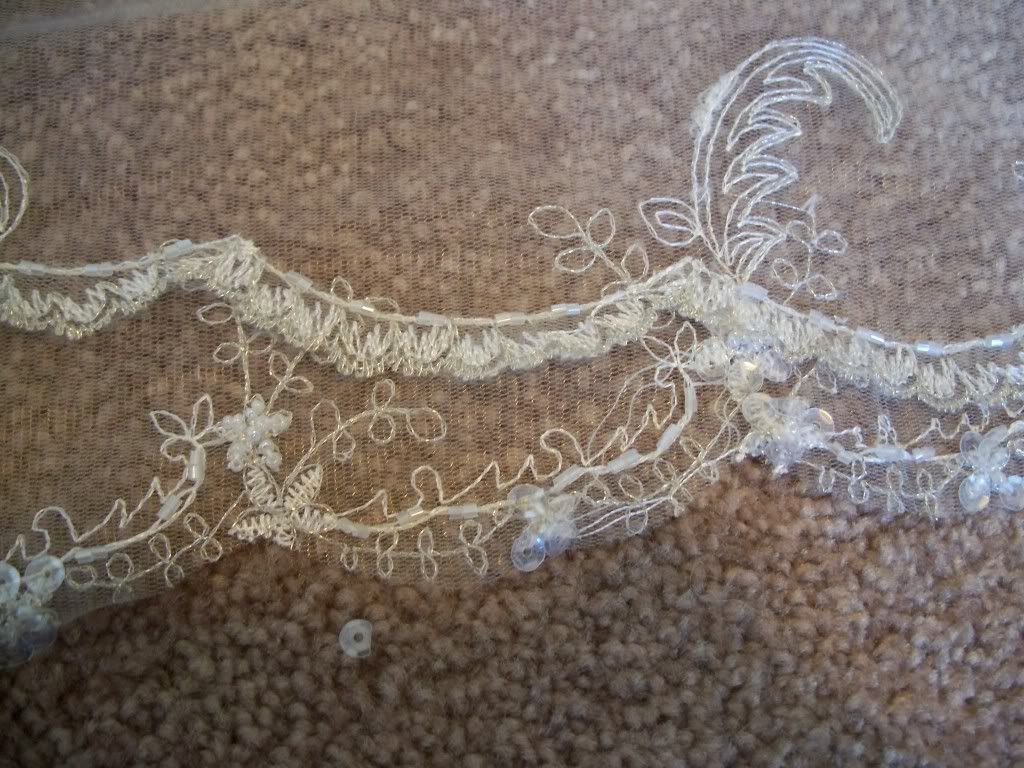
I then carefully pinned the cut bit of lace along the curve of the pattern all the way up to the top, Being careful to overlap the top and bottom pieces to follow the scallop curve. And after pinning it was on to sewing. Using a matching thread I basically couched the edge of the lace piece to the full panel. If you're not familiar with embroidery that is simply bringing the thread up on one side of the piece you are attaching and immediately down on the other side. It forms a little loop over top of it. I wanted it to be secure so I tried to do this at least every quarter inch. The beads, small and long, made for good targets and were secured on both sides.
It certainly wasn't difficult or incredibly painstaking, but it wasn't very fast either. So after a couple of evenings of work the sucker wasn't going anywhere.
Super-super carefully I cut the fabric panel following just to the outside of my hand stitched line. I needed to hide the edge but certainly didn't want anything coming loose.
 |
| It is not easy to get like 4 feet of this stuff gathered into like 7 inches. |
Then it was, finally, time for some machine sewing. Once again it was a simple baste across the top. Except complicated a bit by beads and embroidery getting in the way. I quickly learned that removing any beads in the path of the machine feet was a very smart plan. The heavier tulle plus embroidery and beads was rather heavier that the original tulle experiment. So it was rather more difficult to get everything gathered up in just a few inches. That was some fun pinning.
But I persisted. And while it may not have been the best sewing as the machine struggled with the density of it all, in the end I had a beautiful veil.
And C, of course, was a beautiful bride!

1 comment:
Hooray for sewing skills and for the awesome friend who has them. You are a rock star and your friend is a beautiful bride. LOVE the veil.
Post a Comment