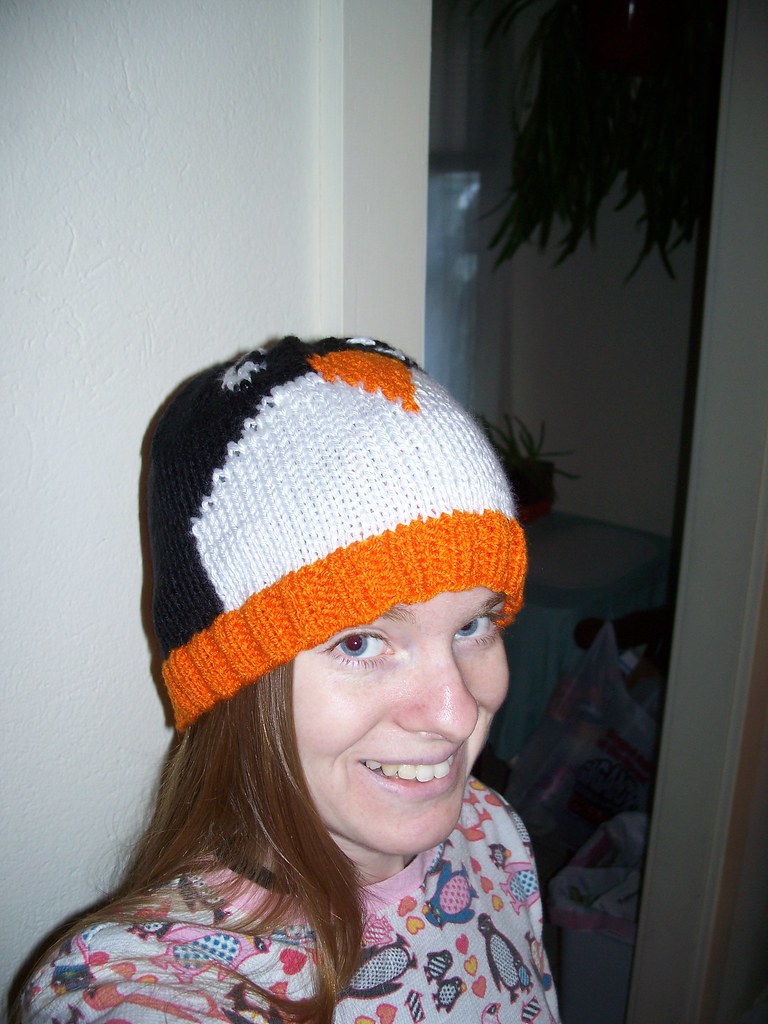
Sitting in my ravelry queue for quite some time was this penguin hat. It's just been sitting there for a few reasons:
1. The pattern is for a small child. I may be small but I am at least bigger than a five year old.
2. It's knit flat and then sewed up in hat shape. I hate that.
3. I don't know how/have never before knit with multiple colors like that.
But on Sunday during my marathon olympics watching I ignored common sense and went for it.
Process:
To start I opened up excel and colored the cells to map out a new color chart that was twice as large as the original. Then I looked at an old hat project that I knitted and considered/compaired to established how many stitches I should cast on. I didn't want to double the original as I figured that would be too large. In the end I choose 100 because well it's nice and easy to remember.
I cast on my orange (red heart super saver I think, basically the cheapst orange I could find was the logic) ribbing on my size 5 circulars but soon switched over to double pointeds where I worked it up a few rows. Then I switched to my black simply soft. I knit approximately half of the black stitches and started to consider how the heck to make the color switches work. A bit of internet research gave me an idea and off I went.

I picked back up the black and proceeded to purl across the already completed black stitches and then when I reached it purled a first row of black on top of the remaining orange stitches until I reached the white. I really ought to have taken pictures but at this point it the picture would show 1 full row of the black and white pattern plus a 2nd row on the inside half of the black. It's entirely possible you have to do it to get it.
From there I twisted the yarns and just continued to purl across the white (using white of course). Then again I turned to the other side of the work and transferred all of the white stitches onto the working needle then picked back up with the black going the other way.
Can you see the pattern there?
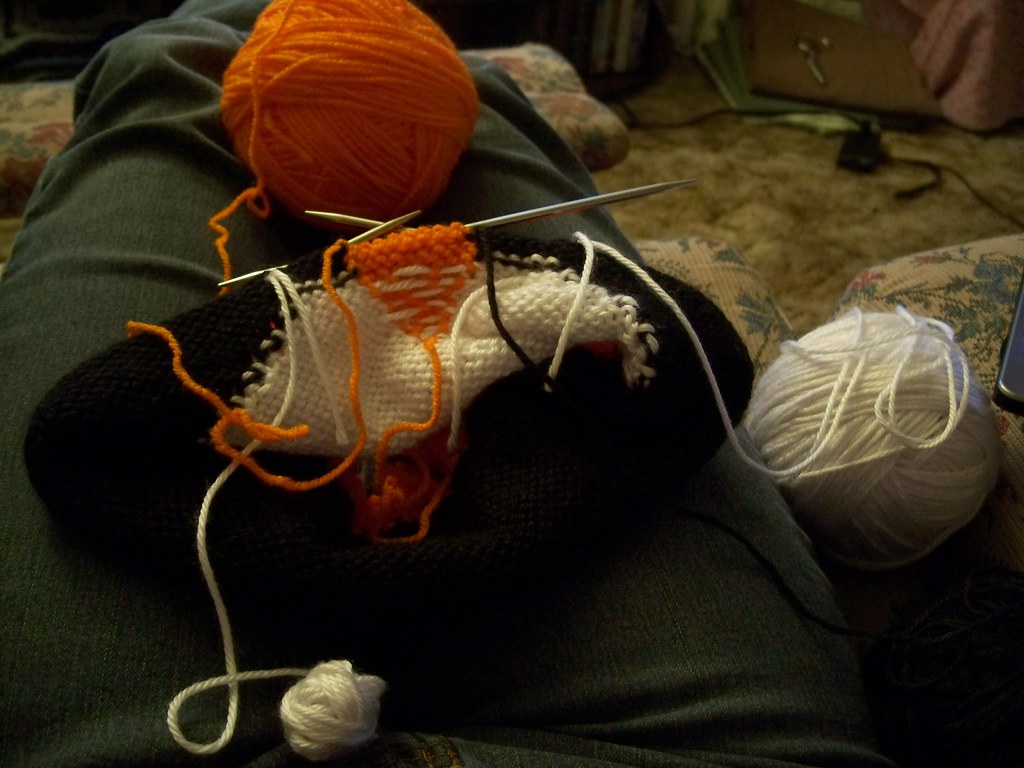
When I got to the pattern portion I would just knit the extra black stitches as needed or leave off the appropriate white stitch to be knit up when I came back around with the black. Then I hit the orange beak. 3 colors - o my.
Actually the beak ended up not being a problem at all. Doing the white back and forth was essentially knitting as one would flat and so I used standard intarsia knitting to form the orange beak just carrying the white behind it.
By the time I got to the top of the white patch where just the beak is sticking up I was ridiculously confsed and it took me forever to figure out what to do next. Theoretically I needed to just do the same thing, but I hadn't really thought through what I was doing (I was just doing whatever worked) so in theory I could do it now and be less confused (famous last words).
At long last reaching the eyes I was impressed that I'd done so much but also quite sure that I am crazy. I just attatched on the white and carried it back and forth wherever I needed it. I don't recomend this as it didn't lay nearly so nice as I would like. Plus I went and messed up and made a few stitches that should have been white black. D'oh.
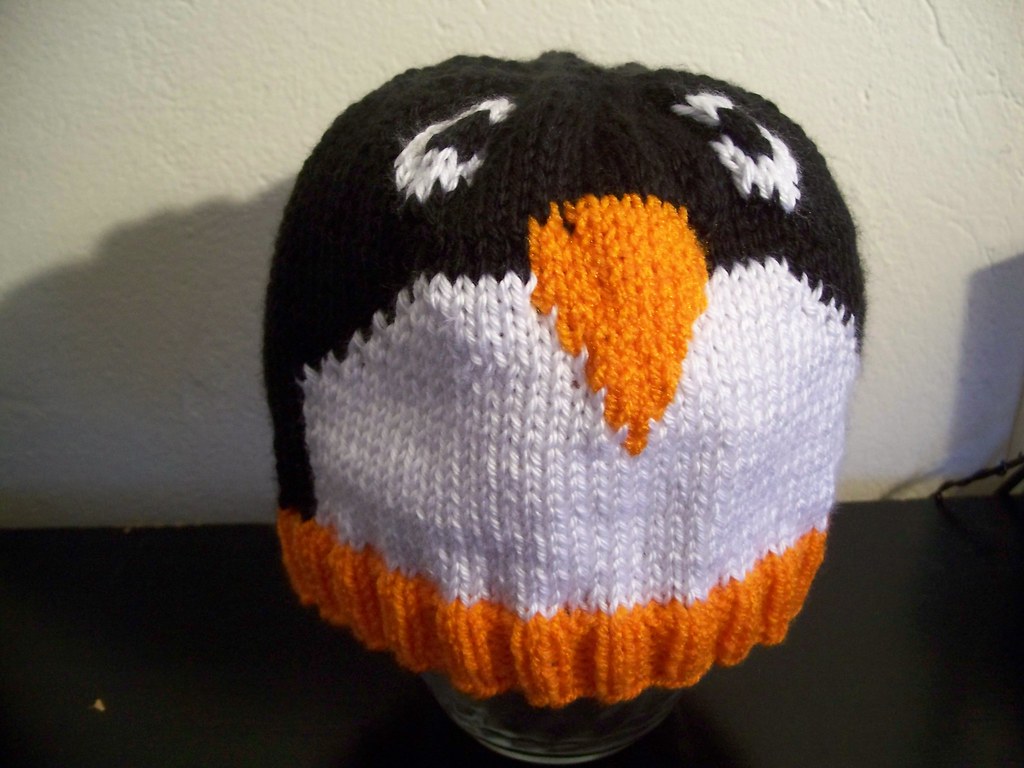
Voila Penguin Hat!
1 comment:
Thanks for the step-by-step instructions. I love your hat!
Post a Comment